Setting up a SQL database with AWS.
A guide based on my first experience.
By Kelly Bodwin in R SQL tutorials
March 9, 2021
Making a database on Amazon
Step 1: Create an AWS account. I did it a long time ago, it’s pretty straightforward, I’m not going to re-do it here for no reason.
Step 2: Follow Items 1-5 only in this tutorial to create a databaset instance.
Step 3: Make sure you choose the free tier! Select whatever username and password you want - but it’s a pain in the butt to add additional users, so if security is not a huge concern and you want your database to be broadly accessible, choose a username and password that you’re willing to share.
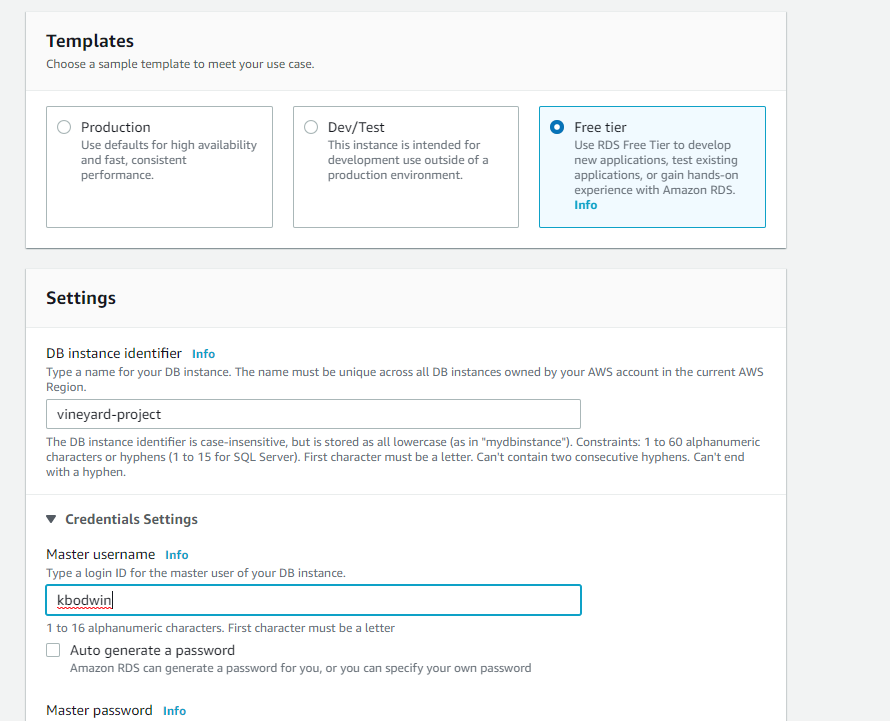
Step 4: Make sure you switch the “Public Access” button to Yes. Again, this is assuming you’re using databases because your data is large, not because you have major security needs.
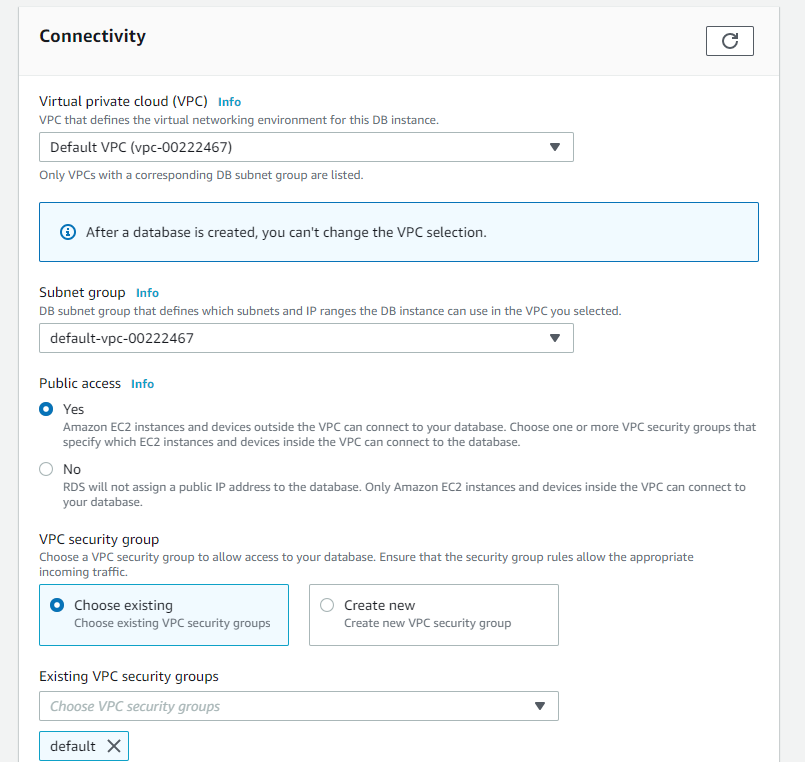
(People still need to know the username and password to access the database, even if it is set to Public.)
Step 5: Click this thing:

Then choose an initial database name:

WARNING! ACHTUNG! ATTENTION!
For the love of all that is good, don’t skip this step. For some reason it isn’t in most of the tutorials I found online.
If you don’t choose a database name, you create only a “database instance”, which is like an empty shell where a database should be.
Why is the default behavior to create an empty shell? No idea.
Can we just add a database to a database instance after creating it? Undoubtedly, but I can’t be arsed to learn that. The goal here is to stay in my safe R bubble. I sunk about an hour into trying to figure that out, unsuccessfully, before deleting my database instance and making a new one.
Step 5: Scroll to the bottom and click “Create Database”. You should see something like this:
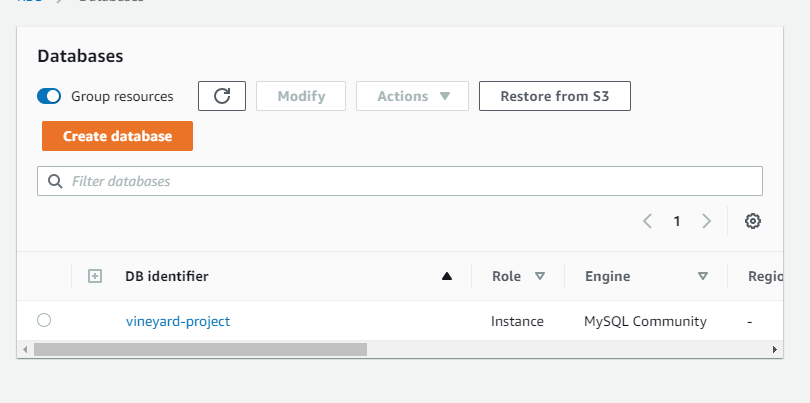
Be patient while Amazon obeys your command and makes your database. Click the name of your database instance (vineyard-project for me). You’ll see this - notice how the banner says it’s still being created, and the “Status” in the Summary pane says “Creating”.
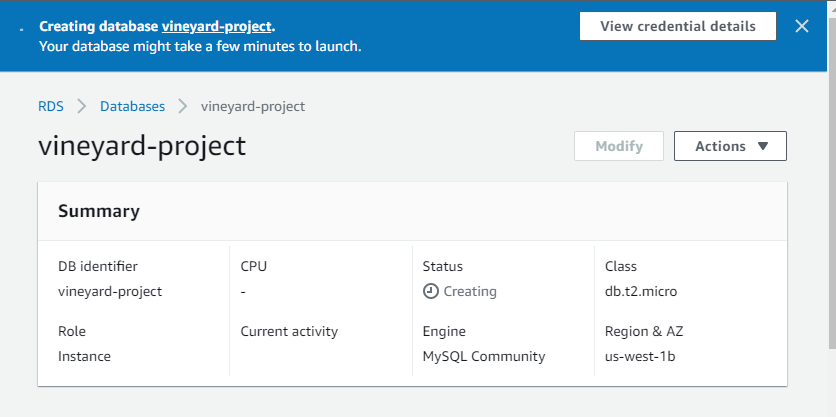
When it’s done, it will look like this:
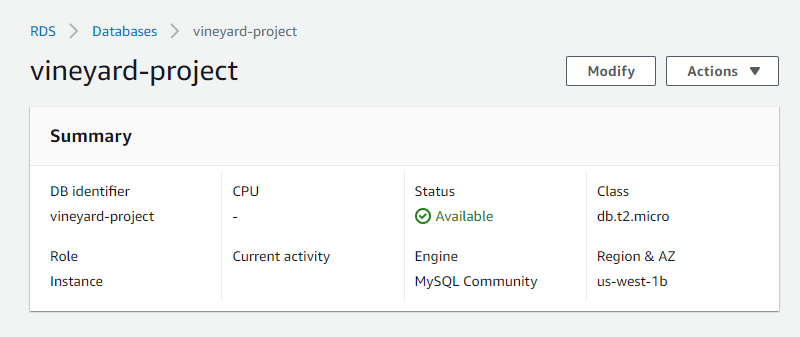
Step 6: Gather your info.
You will need:
-
Your username and password
-
The name of the database that you chose in Step 5
-
Your Endpoint (or “host”) and your Port, which can be found here:
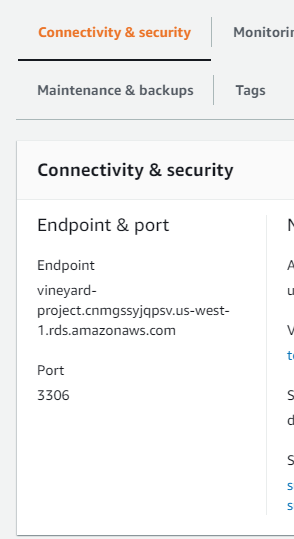
Connecting from R
Okay so the first thing you have to do is install and load a bunch libraries that help R talk to SQL.
|
|
dbplyr is the one that lets you use dplyr R code to sneakily run SQL queries.
The rest of them are just “some packages I need for SQL” and I haven’t bothered to understand what tasks each one covers, or even which of the functions I’m about to use come from which package. Sorry not sorry.
|
|
You can write data to your brand new SQL server like this:
|
|
This might take a long time, depending on how big your data is.
If your data isn’t already in R, or if it’s too big to read into R, I suggest using a third-party helper app.
Stay tuned for Part 2, where we will learn to pull sbusetted SQL data back into R using dbplyr!